Schema Markup and Structured Data: The Complete Guide for Astro
Having a blazing-fast website is great, but if search engines can’t fully understand the context of your content, you are missing out on a huge chunk of organic traffic. This is where Structured Data (Schema Markup) comes into play.
Providing Google with a JSON-LD file literally means “spoon-feeding” it, explaining unequivocally who you are, what you do, and what your page is about. This is the secret behind Rich Snippets (search results enhanced with stars, FAQs, images, and breadcrumbs).
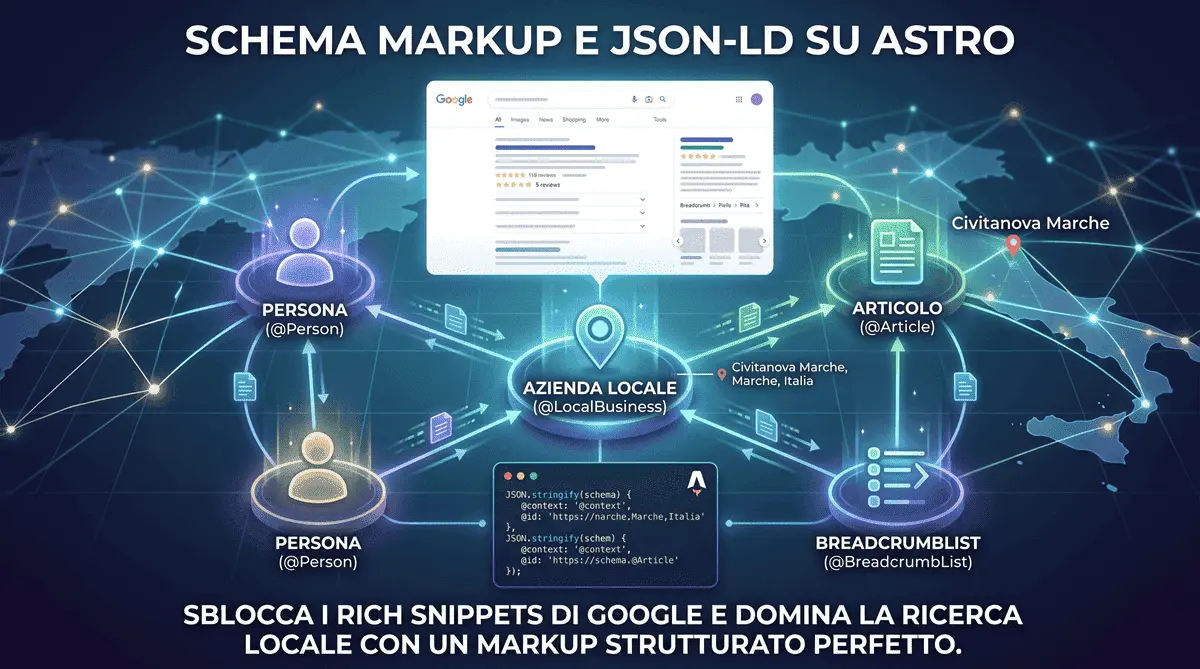
In this article, we’ll look at how to dynamically and cleanly implement JSON-LD markup within an Astro project, covering the 4 most important schemas for a corporate site or portfolio - and avoiding the most common technical mistake: disconnected entities that Google can’t recognize as the same identity.
How to Inject JSON-LD in Astro
Astro makes handling structured data incredibly elegant. Instead of writing JSON strings by hand (risking syntax errors), we can define a standard JavaScript object in the frontmatter and inject it into the <script> tag using the set:html directive and JSON.stringify().
Here is the basic syntax to include in your shared layout (e.g., Layout.astro, if you use one across every page):
---
const schema = {
  "@context": "https://schema.org",
  "@type": "WebSite",
  "name": "My Website",
  "url": Astro.site
};
---

<script type="application/ld+json" set:html={JSON.stringify(schema)} />
Now let’s move on to advanced schemas, ready to be copied and pasted.
The most common mistake: duplicated entities without an @id
Before diving into the examples, a practical warning. The most widespread technical mistake - and one of the most concrete issues I found while auditing my own site - is declaring the same Person (or organization) multiple times across different schemas on the page, each with slightly different data and no explicit link between them. The result is that Google receives inconsistent signals and can’t confidently infer they’re the same identity, weakening your E-E-A-T signal instead of reinforcing it.
The fix is to assign a stable @id to each entity (person, organization, website) and reference it from every other schema, instead of redeclaring it from scratch each time. This is exactly the pattern used on this very site, shown in the examples below.
1. “Person” Schema with a Stable @id (Ideal for Portfolios)
If you are a freelancer, Google needs to associate your website with your identity. The Person schema is fundamental for your personal brand’s SEO - the key detail here is the @id field, which lets any other schema on the page point back to this same entity instead of duplicating it.
---
const personSchema = {
  "@context": "https://schema.org",
  "@type": "Person",
  "@id": "https://www.leonardocastignani.it/#person",
  "name": "Leonardo Castignani",
  "jobTitle": "Software & Web Developer",
  "url": "https://www.leonardocastignani.it",
  "sameAs": [
    "https://github.com/leonardocastignani",
    "https://www.linkedin.com/in/leonardo-castignani/"
  ]
};
---

<script type="application/ld+json" set:html={JSON.stringify(personSchema)} />
2. “LocalBusiness” Schema (For Local SEO)
If you offer location-based services, this schema is your best ally. It tells Google exactly where you are located, helping you appear in “near me” searches. In my case, operating from Civitanova Marche, Italy, this is the exact schema I use on this site to strengthen my local and regional SEO.
---
const localBusinessSchema = {
  "@context": "https://schema.org",
  "@type": "ProfessionalService",
  "@id": "https://www.leonardocastignani.it/#organization",
  "name": "Leonardo Castignani - Software & Web Development",
  "image": "https://www.leonardocastignani.it/logo.png",
  "url": "https://www.leonardocastignani.it",
  "founder": { "@id": "https://www.leonardocastignani.it/#person" },
  "address": {
    "@type": "PostalAddress",
    "addressLocality": "Civitanova Marche",
    "addressRegion": "Marche",
    "addressCountry": "IT"
  },
  "priceRange": "$$"
};
---

<script type="application/ld+json" set:html={JSON.stringify(localBusinessSchema)} />
Notice the founder field: instead of repeating the person’s data, it simply points to the @id declared in the previous schema. Google now knows with certainty that the two entities are the same.
3. “Article” Schema (For the Blog)
For every blog post, you should dynamically generate the Article schema. This drastically increases your chances of appearing in Google Discover or news carousels. Here too, author references the person’s @id instead of redeclaring it - avoiding exactly the inconsistency described above.
---
// In your BlogPost.astro layout
const { title, description, pubDate, heroImage } = Astro.props;

const articleSchema = {
  "@context": "https://schema.org",
  "@type": "BlogPosting",
  "headline": title,
  "description": description,
  "image": new URL(heroImage, Astro.site),
  "datePublished": new Date(pubDate).toISOString(),
  "author": { "@id": "https://www.leonardocastignani.it/#person" }
};
---

<script type="application/ld+json" set:html={JSON.stringify(articleSchema)} />
4. “BreadcrumbList” Schema
This schema helps Google understand your site’s hierarchy and generates those beautiful, clickable paths in search results (e.g., Home > Blog > Article Name).
---
const breadcrumbSchema = {
  "@context": "https://schema.org",
  "@type": "BreadcrumbList",
  "itemListElement": [
    {
      "@type": "ListItem",
      "position": 1,
      "name": "Home",
      "item": "https://www.leonardocastignani.it"
    },
    {
      "@type": "ListItem",
      "position": 2,
      "name": "Blog",
      "item": "https://www.leonardocastignani.it/blog"
    }
  ]
};
---

<script type="application/ld+json" set:html={JSON.stringify(breadcrumbSchema)} />
Validation: The Ultimate Test
After implementing these schemas, don’t blindly trust the code. Build your local Astro project (npm run build followed by npm run preview) and inspect the source code to ensure the JSON is formatted correctly and hasn’t been improperly escaped.
Once in production, paste your page URL into Google’s Rich Results Test. This free tool will immediately confirm if your syntax is correct and which rich snippets you are eligible to receive.
Conclusion
Implementing structured data is one of those tasks that separates an “amateur” developer from a professional. With Astro, integrating and automating JSON-LD markup generation is a clean, component-based process, free from the hydration defects that often plague traditional React applications - as long as you link your entities with @id instead of duplicating them.
If you’d like to see this exact approach applied to a real production case, including a dynamically generated sitemap and structured data for every article, I documented the whole process in the technical SEO case study of this very site.
Frequently Asked Questions
Why is JSON-LD essential for international SEO?
By spoon-feeding Google exact details about your content using JSON-LD, your website becomes eligible for global Rich Snippets, drastically improving click-through rates.
How does Astro handle Structured Data compared to WordPress or SPAs?
Astro handles JSON-LD elegantly at the component level without relying on bloated plugins or suffering from the hydration defects common in single-page applications.
Do you build technical SEO architectures for global clients?
Yes. Operating from Italy, I engineer high-performance Astro websites with strictly localized structured data, helping international brands dominate their target search markets.


Have a similar project in mind?
If this article gave you useful ideas, I can help you put them into practice on your site or project.
Get a Free Quote